Olla pots are one of the oldest and most elegant solutions to a problem that every gardener faces: how do you keep plants consistently watered without wasting precious resources or spending hours hovering over your plot with a hose? These unglazed clay vessels have been used for thousands of years across arid regions of the world, and they're making a well-deserved comeback in community gardens everywhere.
Whether you're dealing with a busy schedule, a water-restricted site, or simply want to garden more sustainably, olla (pronounced "oy-ya") pots offer a remarkably simple and effective approach to sub-surface irrigation. This guide will walk you through everything you need to know to get started with this ancient technique in your individual community garden plot.
What Are Olla Pots and How Do They Work?
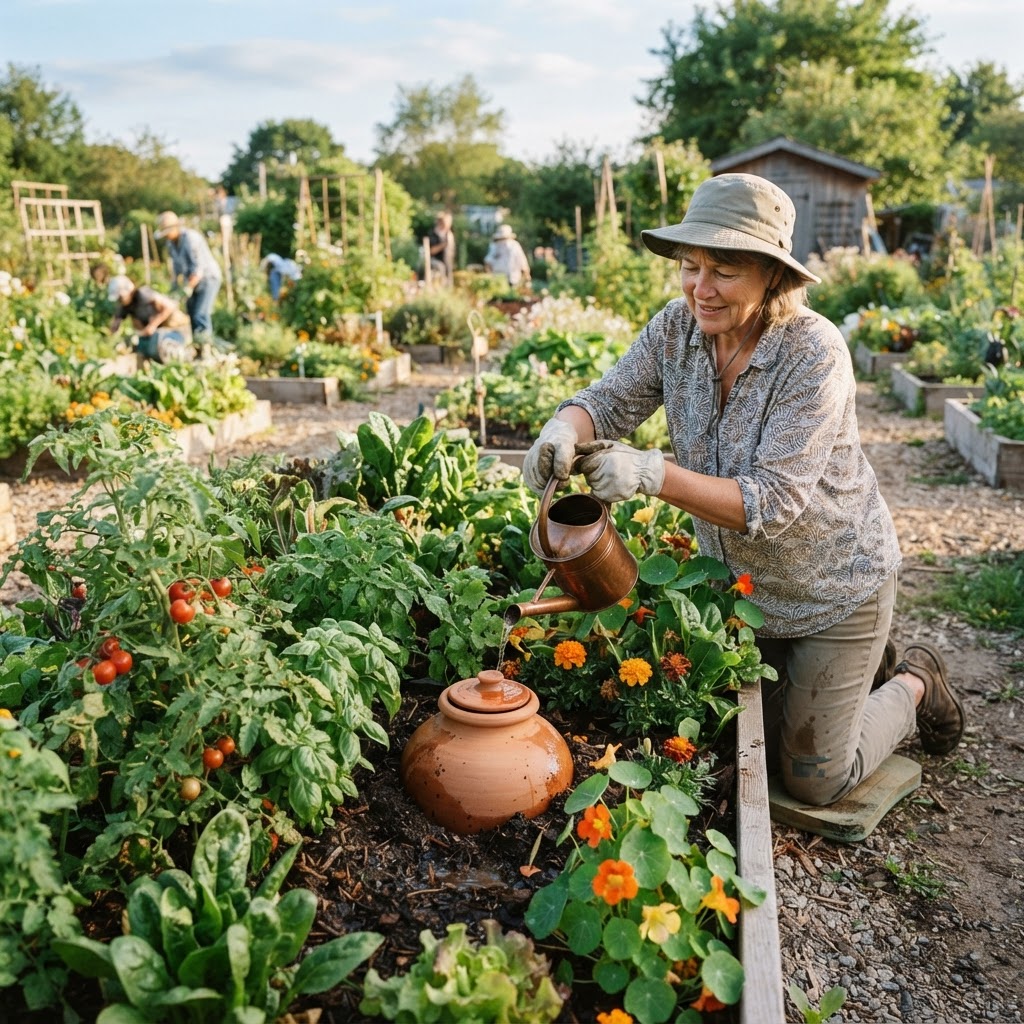
Olla pots are unglazed terracotta or clay vessels, traditionally shaped like a rounded jug or amphora with a narrow neck. The key to their function lies in the porous nature of the fired clay. When filled with water and buried in the soil, the vessel slowly seeps moisture outward through its walls in direct response to the surrounding soil conditions.
This process is driven by something called osmotic tension. When the soil around the olla is dry, it pulls water through the clay walls. As the soil becomes adequately moist, that tension decreases and the seepage slows down. In other words, the olla essentially communicates with your plant roots, releasing water on demand. This makes it one of the most efficient irrigation methods available to home and community gardeners alike.
The narrow neck sits above the soil surface, allowing you to top up the pot with water as needed, while a lid or cap prevents evaporation and keeps insects and debris out. Roots naturally grow toward the buried vessel, creating a dense, healthy root zone right where the moisture is.
The Benefits of Using Olla Pots in Community Gardens
Community gardens present unique challenges. Water access can be limited, schedules are unpredictable, and not every gardener can visit their plot every day. Olla pots address many of these challenges directly.
Water efficiency is perhaps the most compelling advantage. Because water is delivered directly to the root zone and released gradually, there is virtually no surface evaporation loss and minimal runoff. Compared to overhead watering, ollas can significantly reduce the amount of water needed to keep plants healthy.
Reduced weed growth is another welcome bonus. Since the soil surface stays relatively dry, weed seeds that depend on surface moisture have a much harder time germinating. This means less time weeding and more time enjoying your garden.
Consistency is something plants truly appreciate. Ollas provide a steady, gentle supply of moisture that mimics natural rainfall patterns far more closely than the feast-or-famine cycle of occasional hand watering. Plants grown with olla irrigation often show stronger, more even growth.
Low maintenance makes ollas especially appealing for busy community gardeners. Once installed and filled, a single olla can keep nearby plants hydrated for several days to a week or more, depending on weather conditions and soil type.
Finally, ollas require no electricity, no timers, and no complex plumbing. They are genuinely low-tech, making them ideal for community gardens that don't have reliable infrastructure or for gardeners who prefer simple, sustainable methods.
Getting Started
If you've never used an olla pot before, the good news is that the setup process is straightforward. Here's what you'll need and how to begin.
What You'll Need
- One or more olla pots sized appropriately for your plot
- A trowel or small spade for digging
- Water for the initial fill
- A lid, cap, or even a flat stone to cover the opening
- Optional: a funnel to make filling easier
Step-by-Step Installation
1. Choose your location carefully. Before you plant anything, decide where your olla pots will go. Each pot has a limited radius of influence, typically reaching outward somewhere between 30 and 60 centimetres depending on the pot's size and your soil type. Sandy soils allow water to spread more quickly but may dry out faster; clay-heavy soils spread moisture more slowly but retain it longer. Place your olla so that the plants you want to water fall within that zone.
2. Dig the hole. You want the pot to sit with only its neck and opening above the soil surface. Dig a hole slightly larger than the widest part of your olla to make placement easier, but not so large that there are big air gaps around the vessel. Firm soil contact with the clay surface is important for effective seepage.
3. Place the olla in the hole. Lower the pot gently into position and backfill around it, pressing the soil in firmly to eliminate air pockets. The opening should sit a few centimetres above the soil line.
4. Fill the olla with water. Pour water in slowly through the neck until it's full. You may notice it begins seeping through the walls almost immediately if the clay is dry. This is normal and will slow down once the clay itself is saturated.
5. Cap the opening. Place your lid or cover over the top to prevent evaporation and keep out insects, mosquito larvae, and debris.
6. Plant around the olla. Now you're ready to plant your seedlings or seeds in the moistened zone around the buried pot.
Choosing the Right Olla Pot for Your Plot
Olla pots come in a range of sizes, from small pots that hold a litre or two, to large vessels holding ten litres or more. The right size depends on the number of plants you want to water, how frequently you can visit your plot to refill, and what you're growing.
For a small individual plot or raised bed, a medium-sized olla holding four to six litres is often a practical starting point. This size can typically support a cluster of vegetables within a radius of around 40 to 50 centimetres and may only need refilling every few days in warm weather.
If your plot is larger, consider using multiple smaller ollas rather than one enormous pot. This gives you more even coverage and allows you to position each pot at the optimal distance from the plants it serves.
You can purchase purpose-made olla pots from garden suppliers, including right here at Community Garden Shop, or you can make your own using a pair of unglazed terracotta pots sealed together at the drainage holes. The DIY method is a budget-friendly option and works surprisingly well.
Planting Around Your Olla
The placement of your plants relative to the olla makes a real difference. Ideally, place your plants in a ring around the pot, within the moisture zone. For larger vegetables like tomatoes, squash, or courgettes, one or two plants per medium olla is appropriate. For smaller plants like lettuce, herbs, or beetroot, you might fit four to six within the effective range.
Avoid planting directly on top of the olla. Roots that wrap tightly around the pot can block the pores in the clay and reduce the seepage rate over time.
Deep-rooted plants like tomatoes and peppers tend to do exceptionally well with olla irrigation because their roots actively seek out moisture and will grow toward the buried vessel. Shallow-rooted crops may need supplemental surface watering during dry spells, particularly when they are young seedlings.
Maintaining Your Olla System
Maintenance is minimal, which is one of the great joys of this system. Your primary tasks are refilling and occasional cleaning.
Refilling: Check your olla every few days. In very hot or dry conditions, the water level can drop quickly. In cooler weather or after rain, you may find it still reasonably full. Simply pour water into the neck to top it up.
Cleaning: Over time, algae can build up inside the pot, and mineral deposits may start to clog the pores of the clay. At the end of each growing season, remove the olla, empty it, and scrub the inside gently with a stiff brush and a mild solution of water and white vinegar. Rinse thoroughly. Allow it to dry completely before storing it to prevent cracking in cold weather.
Winter storage: Unglazed clay is vulnerable to frost damage. If water inside the pot freezes and expands, the pot can crack. Always empty, dry, and store your ollas indoors or in a shed during the colder months.
Common Mistakes to Avoid
Even a simple system can go wrong without a little guidance. Here are the most common pitfalls to watch out for when using olla pots.
Leaving air gaps around the pot. If the soil isn't making firm contact with the clay surface, the osmotic exchange doesn't work efficiently. Take time to press soil firmly around the olla when you install it.
Forgetting to cap the opening. An uncovered olla will lose a surprising amount of water to evaporation, and it becomes a perfect breeding ground for mosquitoes. Always use a lid.
Overestimating the coverage area. It can be tempting to assume one olla will water your entire plot. In reality, each pot has a limited range. Plan your layout carefully and use multiple pots if needed.
Using glazed pots by mistake. Glazed terracotta pots will not work for this purpose. The whole system relies on the porosity of unglazed clay. Always check that your olla is truly unglazed on the outside.
Neglecting refills in hot weather. During a heatwave, your olla can empty in just a day or two. If you're going away, ask a fellow gardener to top it up, or install a simple gravity-fed refill system using a water bottle inverted into the neck.
Not cleaning between seasons. Clogged pores significantly reduce the effectiveness of your olla. Annual cleaning keeps the system working as it should.
Tips for Success
With a bit of attention to detail, ollas can transform the way you manage your plot. Here are some practical strategies to get the most from your system.
-
Mulch around the olla. Applying a layer of straw, wood chips, or compost around the base of the neck helps retain even more moisture in the soil and keeps the surface cool. This works beautifully with the olla's underground delivery system.
-
Mark the location clearly. Once buried, it can be easy to forget exactly where your olla is. Use a small stake or mark the surrounding bed so you don't accidentally dig into it during weeding or planting.
-
Start with one or two pots. If you're new to ollas, begin with a small installation so you can observe how well they work in your particular soil and with your chosen crops before committing to a full system.
-
Keep a refilling journal. Note how often you need to top up the pot in different weather conditions. This helps you predict how long you can be away from your plot without plants suffering.
-
Combine with drip irrigation for larger plots. Ollas are ideal for small to medium-sized plots. For bigger community garden allotments, you might use ollas for intensive growing beds and supplement with drip irrigation elsewhere.
-
Try them in containers too. Smaller ollas or DIY versions can be used in large containers and raised beds, where consistent moisture is especially challenging to maintain.
-
Talk to your fellow gardeners. Ollas are a great conversation starter at the community garden. Sharing experiences and tips with neighbours can help everyone refine their technique.
Conclusion
Olla pots represent one of those rare cases where the oldest solution really is one of the best. By harnessing the natural properties of porous clay, these simple buried vessels deliver water precisely where plants need it most, reduce waste, discourage weeds, and free you from the tyranny of daily watering schedules.
For community gardeners who want a low-maintenance, sustainable, and genuinely effective irrigation approach, ollas are hard to beat. They require a modest initial investment and a little care at the start and end of each season, but the rewards — healthy plants, lower water use, and more free time — make them well worth it.
Whether you're managing a small raised bed or a generous allotment plot, adding even one or two olla pots to your setup could make a noticeable difference this season. Why not give this ancient technique a try and see what your plants think?