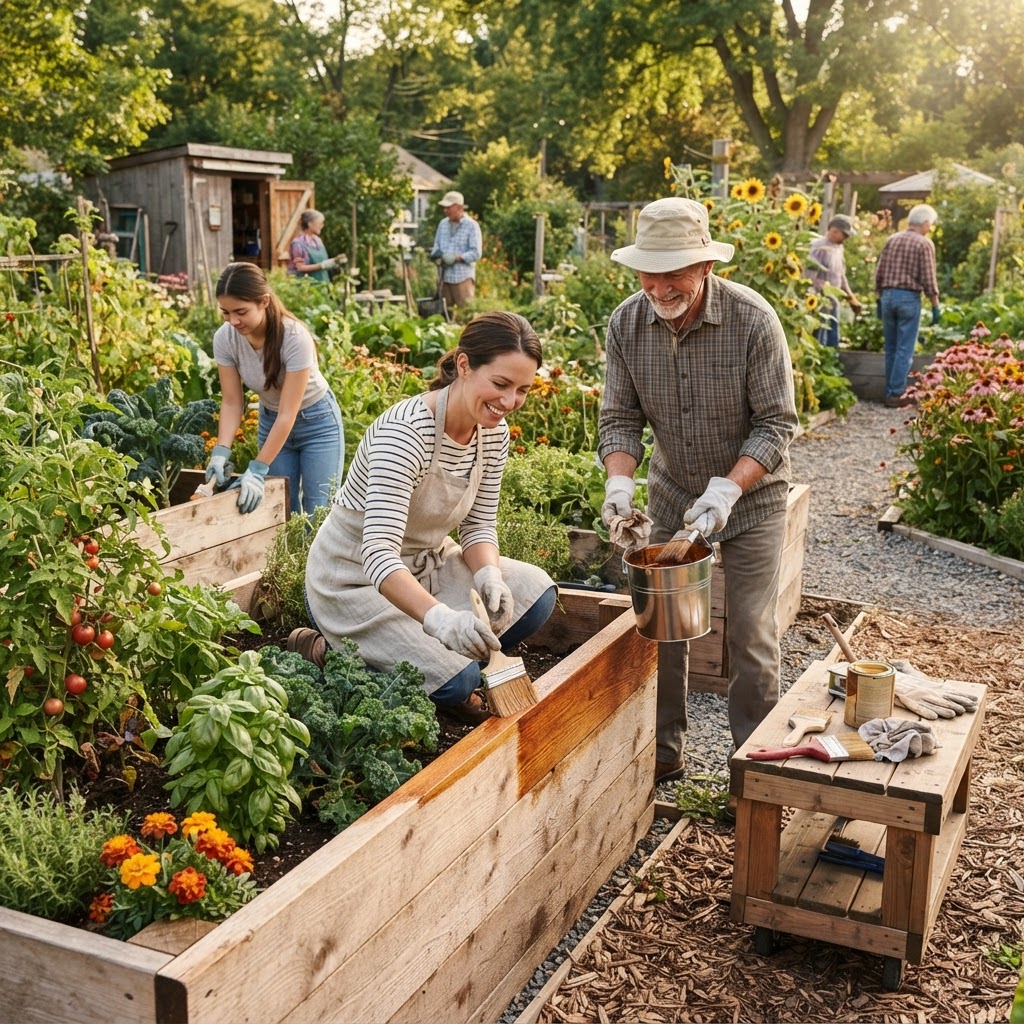
Getting Started
Before you reach for any sealant or preservative, there are a few foundational steps that will make everything else easier and more effective.
Assess the current condition of your wood. Run your hands along the boards and look for soft spots, cracks, discoloration, or signs of mold. If the wood is already deeply rotted in sections, sealing over the damage won't fix it — you'll need to replace those boards first. Healthy wood responds to treatment; compromised wood just hides problems temporarily.
Clean the surface thoroughly. Dirt, old soil, algae, and organic debris all prevent sealants from penetrating properly. Use a stiff brush and warm water to scrub the exterior surfaces. For stubborn mold or mildew, a diluted white vinegar solution (roughly one part vinegar to two parts water) works well without introducing chemicals. Allow the wood to dry completely — ideally for at least 48 hours in dry weather — before applying anything.
Identify your wood type. Different species respond differently to treatments. Cedar and redwood are naturally rot-resistant and require less intervention. Pine, spruce, and fir are more porous and will benefit most from thorough sealing. Douglas fir falls somewhere in between. Knowing what you're working with helps you choose the right approach and set realistic expectations for how long treatments will last.
Gather your materials. For non-toxic preservation, you'll typically need a few basic items: food-grade linseed oil or tung oil, a clean rag or brush, a container for mixing (if needed), and protective gloves. More on specific products in the next sections.
Why Non-Toxic Sealing Matters in Community Gardens
This point deserves emphasis, especially in a community garden setting. When you're growing vegetables, herbs, and fruits in raised beds, the soil inside those beds is a living ecosystem. Earthworms, beneficial microbes, and the complex chemistry of healthy growing medium all contribute to the food you harvest. Introducing toxic compounds — even in small amounts — can disrupt that ecosystem and potentially contaminate what you eat.
Traditional wood preservatives like creosote, copper naphthenate, and chromated copper arsenate (CCA) were once common in agricultural settings. CCA-treated lumber, in particular, was widely used for raised beds before research revealed that arsenic and other heavy metals leach into surrounding soil. This type of treated lumber is now widely discouraged for food-growing applications, and many community garden organizations have policies prohibiting it entirely.
Beyond direct contamination concerns, community gardens are shared spaces. What one member puts on their bed can affect neighbors, shared pathways, and children who play nearby. Choosing non-toxic options is an act of community responsibility, not just personal preference.
Choosing the Right Wood for Longevity
Sometimes the best preservation strategy starts before a single board is installed. If your community garden is planning new beds or replacing existing ones, choosing naturally durable wood dramatically reduces how much sealing work you'll need to do.
Cedar is the gold standard for raised bed construction. Its natural oils repel moisture and insects, and untreated cedar beds can last anywhere from eight to fifteen years with minimal maintenance. It's also lightweight and easy to work with.
Redwood shares many of cedar's qualities and is an excellent choice where available. It tends to be more expensive but is exceptionally durable.
Black locust is a lesser-known option that is harder than most hardwoods and extremely rot-resistant. It's a wonderful choice if you can source it locally.
Douglas fir is widely available and reasonably durable, though it benefits more from active sealing than cedar or redwood.
Avoid pressure-treated lumber for any surface that will come into contact with soil in a food garden. While modern pressure-treated lumber has moved away from arsenic-based compounds, the newer treatments using copper azole or alkaline copper quaternary still raise questions in the food-growing community, and many experienced gardeners prefer to stay away entirely when non-toxic alternatives exist.
Natural and Non-Toxic Sealing Options
Here's where things get practical. There are several excellent non-toxic options for sealing and preserving garden bed wood, each with its own advantages.
Raw Linseed Oil
Derived from flaxseed, raw linseed oil is one of the oldest wood preservatives in existence. It penetrates deeply into wood grain, conditioning it from the inside out and providing meaningful moisture resistance. For garden beds, food-grade or pure linseed oil (not boiled linseed oil, which contains metallic driers) is the safest choice.
The main downside of raw linseed oil is that it dries slowly — sometimes taking several days depending on temperature and humidity. Apply it in warm, dry weather and give it ample time to cure before the bed contacts soil again.
Tung Oil
Tung oil, pressed from the nuts of the tung tree, is a food-safe, naturally drying oil that creates a harder finish than linseed oil. It offers excellent water resistance and is particularly good for beds in rainy climates or those positioned in areas with poor drainage.
Look for 100% pure tung oil without chemical additives. Some commercial products labeled as "tung oil finish" include varnish or synthetic compounds — always read ingredient labels carefully.
Beeswax and Carnauba Wax Blends
Wax-based treatments sit on the surface of the wood rather than penetrating deeply, creating a physical barrier against moisture. Beeswax is naturally antimicrobial and works beautifully on its own or blended with a carrier oil like linseed or tung oil for better penetration.
A simple DIY blend of melted beeswax and raw linseed oil (approximately one part beeswax to three parts oil by volume) creates an effective, fully natural sealant. Warm the mixture gently until combined, then apply with a cloth while still warm. This is a satisfying, hands-on option that many community gardeners enjoy making together as a group activity.
Lemon Oil and Orange Oil
Citrus-derived oils have natural antifungal properties and can be used as a supplemental treatment, particularly on interior wood surfaces or in problem areas prone to mold. They're less effective as standalone sealants but work nicely in combination with wax or linseed oil treatments.
Exterior Grade Natural Wood Stains
Several manufacturers now produce water-based, zero-VOC wood stains made from plant-derived pigments and natural resins. These provide UV protection, moisture resistance, and color all in one application. Look for products specifically certified as food-safe or designed for use in garden settings.
Step-by-Step Application Guide
Once you've chosen your sealant, follow these steps for the best results.
Step 1: Final surface preparation. Sand rough edges lightly with medium-grit sandpaper if needed. This improves absorption and prevents splinters.
Step 2: Apply the first coat generously. Using a clean brush, rag, or sponge applicator, work the oil or sealant into the wood using long, even strokes. Focus on end grains, joints, and corners — these areas absorb the most moisture and are where rot typically begins.
Step 3: Allow full absorption. Let the first coat soak in for at least 20 to 30 minutes, then wipe away any excess that hasn't been absorbed. Pooled oil on the surface won't cure properly and can become sticky.
Step 4: Apply a second coat. After the first coat has dried (timing varies by product and weather conditions), apply a second coat using the same technique. Two coats are generally sufficient for most wood types, though very porous or dry wood may benefit from a third.
Step 5: Allow full curing before use. Give treated beds at least 72 hours before adding soil or beginning planting. Warmer temperatures speed curing time; cool or damp conditions slow it down significantly.
Maintenance and Reapplication Schedule
Non-toxic sealants don't last forever, but staying on top of reapplication is straightforward once you establish a routine.
For most oil-based treatments, plan to reapply once a year — ideally in early spring before the growing season begins, or in late autumn after you've cleared the beds for winter. Cedar and redwood beds may only need treatment every two years, while pine or fir beds may benefit from more frequent attention.
Look for these signs that reapplication is due: the wood appears dry and gray, water no longer beads on the surface, or you notice soft spots beginning to develop. Catching these warning signs early and treating promptly can extend the life of your beds significantly.
Common Mistakes to Avoid
Even well-intentioned gardeners can make missteps when sealing their beds. Here are the most common errors to watch out for.
Using boiled linseed oil instead of raw. Boiled linseed oil contains metallic drying agents (often cobalt or manganese compounds) that speed drying but introduce chemicals you don't want near food-growing soil. Always use food-grade raw linseed oil.
Applying sealant to damp wood. Moisture trapped under a sealant leads to bubbling, poor adhesion, and accelerated rot. Patience here is crucial — wait for a proper dry window before treating.
Skipping end grains. The cut ends of boards are the most vulnerable parts of any wood structure. They absorb water like a straw and rot first. Apply extra sealant to all end grains and don't rush through these spots.
Over-applying and not wiping excess. More is not better with oil-based treatments. Excess oil that isn't absorbed just sits on the surface, becomes tacky, collects dirt, and may even prevent proper wood breathing. Wipe away surplus after each coat.
Treating the inside surfaces with oil. The interior faces of the boards — those in contact with soil — should generally be left untreated or treated very minimally. Oils and waxes on interior surfaces can create anaerobic conditions that actually promote certain types of rot and may affect soil biology. Focus your sealing efforts on exterior-facing surfaces.
Using products labeled "natural" without reading ingredients. Not all naturally-marketed wood products are food-safe or appropriate for garden use. Some contain fungicides or UV stabilizers that aren't appropriate near edible plants. Read labels carefully and when in doubt, contact the manufacturer.
Tips for Success
Here are some actionable tips to get the most out of your wood preservation efforts.
- Time your application with the weather. Ideal conditions are dry days above 15°C (60°F). Applying oil in cold weather significantly extends drying time and reduces penetration.
- Work in pairs when possible. One person applies while another wipes excess — this speeds up the job and ensures more even coverage.
- Keep detailed records. Note when you last treated each bed and with what product. This is especially useful in shared community gardens where multiple people may be responsible for maintenance.
- Store leftover oil safely. Oil-soaked rags can be a fire hazard as they cure. Spread them flat outdoors to dry completely before disposing of them, or store in a sealed metal container.
- Consider a protective gravel or mulch border. Reducing soil splash against the outside of your boards goes a long way toward preventing moisture-driven rot, regardless of what sealant you use.
- Elevate beds slightly if possible. Even a small gap between the bottom of the boards and the ground improves airflow and dramatically reduces moisture retention at the base.
Conclusion
Preserving your community garden's raised beds without toxic chemicals isn't complicated — it just requires choosing the right materials, preparing properly, and committing to occasional maintenance. By selecting naturally rot-resistant wood species, applying food-safe oils and waxes with care, and staying alert to signs of wear, you can keep your beds in excellent condition for many years.
More than just practical advice, this approach reflects a core value of community gardening: tending to the whole ecosystem, not just the plants we harvest. When we protect our beds with ingredients that come from nature and return safely to it, we're honoring the health of our soil, our neighbors, and everyone who eats the food we grow together.
Take your time, work with your fellow gardeners, and enjoy the process. A well-maintained garden bed is something to be genuinely proud of.