Antique garden tools carry with them a kind of quiet history — the worn wooden handles, the rust-kissed blades, the comfortable weight of something built to last generations. If you've ever stumbled upon an old spade at a garage sale or inherited a collection of weathered hoes from a grandparent's shed, you already know that these tools often have more character than anything sold in a modern hardware store. Better still, many of them were made from higher-quality steel and hardwood than their contemporary counterparts, meaning they're absolutely worth saving.
Restoring and sharpening antique garden tools is a deeply satisfying practice that saves money, reduces waste, and connects you to a long tradition of careful stewardship. Whether you're a community gardener looking to stock your shared tool shed with dependable equipment or a home gardener hoping to breathe new life into a rusty find, this guide will walk you through everything you need to know.
Getting Started
Before you dive into any restoration project, it helps to set yourself up with the right workspace and the right mindset. Restoring antique garden tools doesn't require a professional workshop, but a few basic supplies and some preparation will make the whole process much smoother.
What You'll Need
Gather the following supplies before you begin:
- Wire brushes (both handheld and wire wheel attachments for a drill if available)
- Coarse, medium, and fine-grit sandpaper (80, 120, and 220 grit are good starting points)
- White vinegar or oxalic acid (for rust removal)
- Rust converter or naval jelly (optional, for heavy rust)
- Linseed oil or tung oil (for handle conditioning)
- A mill file or flat bastard file (for sharpening)
- A whetstone or sharpening stone (for refining edges)
- Linseed oil or boiled linseed oil (for metal protection)
- Safety gloves, eye protection, and a dust mask
- A stable work surface or workbench
Setting Up Your Workspace
Work outdoors or in a well-ventilated area, especially when sanding or using chemical rust removers. Lay down an old tarp or newspapers to catch rust flakes and debris. Keep a bucket of water nearby if you're working with acids, and always wear gloves and eye protection.
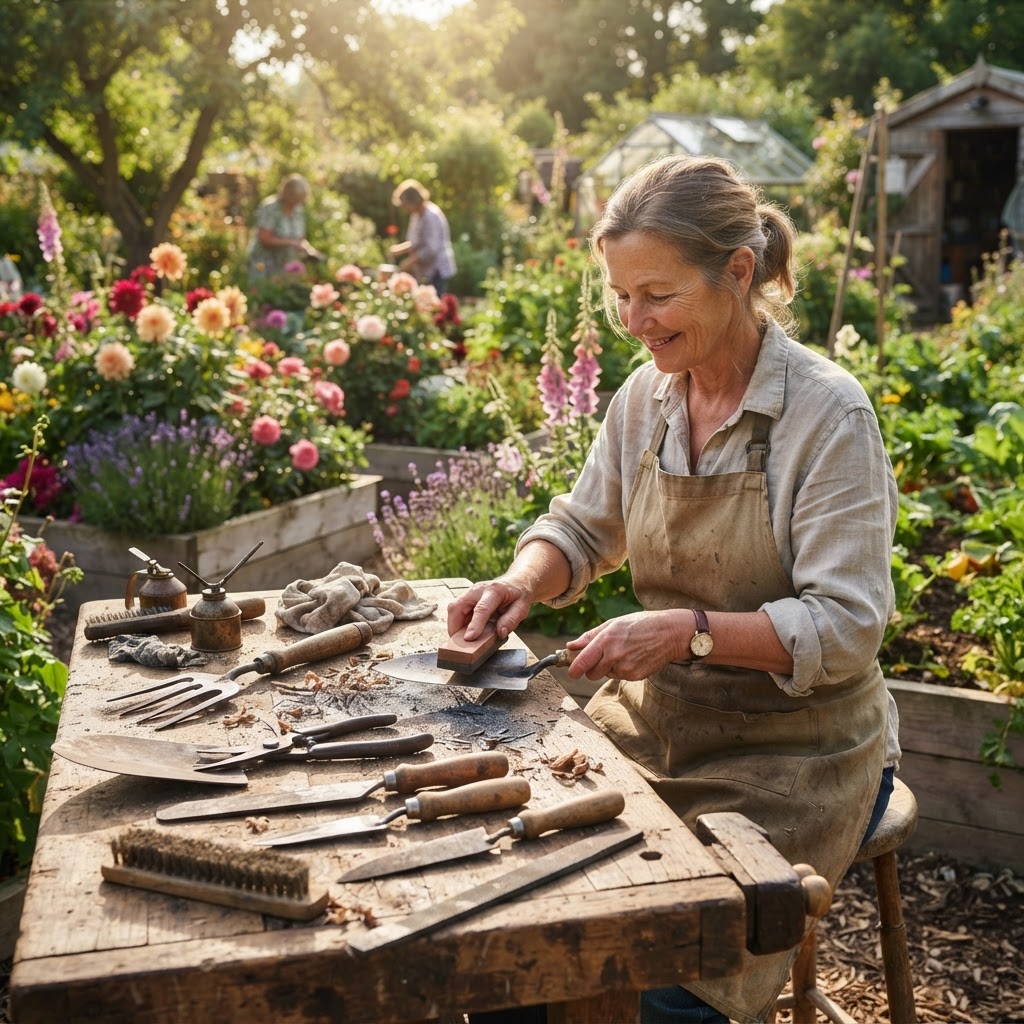
If you're doing this as part of a community garden project, consider organizing a tool restoration day where members can bring old tools and share supplies. It's a wonderful way to build community while extending the life of shared equipment.
Assessing the Condition of Your Tools
Not all antique tools are worth restoring, and before you invest time and materials, it's worth taking a careful look at what you're working with.
Evaluating Metal Parts
Check the metal blade or tine for the following:
- Surface rust: Light to moderate orange or brown rust is almost always removable and shouldn't deter you.
- Deep pitting: Some pitting is cosmetic, but deep structural pitting can weaken a blade significantly. Run your fingernail across pitted areas — if it catches deeply, the tool may have compromised integrity.
- Cracks or breaks: A cracked blade is generally not worth repairing for regular use, especially on tools like spades or forks where structural strength is critical.
- Bends or warping: Minor bends can sometimes be straightened with a vice and hammer, but severely warped metal may not regain usefulness.
Evaluating Wooden Handles
Wooden handles are often the most salvageable part of an antique tool, but they need a close inspection too:
- Splits or cracks along the grain: Small surface cracks can be sanded and oiled away. Deep splits running the length of the handle compromise safety and should be replaced.
- Rot or soft spots: Press firmly along the handle. Any soft, spongy areas indicate rot, and that section of handle needs replacement.
- Loose ferrules or socket connections: A wobbly head is a safety hazard. Check whether the handle is simply dry and shrunk (often fixable with oiling) or structurally broken.
- Woodworm damage: Small round holes and powdery residue indicate woodworm. Light infestations can sometimes be treated, but heavily tunneled handles should be replaced.
Cleaning and Removing Rust
Rust removal is often the most labor-intensive step, but it's also the most transformative. Watching the gleam of good metal emerge from beneath years of orange oxidation is genuinely rewarding.
The Vinegar Soak Method
White vinegar is an affordable, widely available, and effective rust remover. For tools with moderate rust:
- Fill a bucket or tub with undiluted white vinegar — enough to submerge the metal parts.
- Soak the tool for several hours or overnight. For heavy rust, a 24-hour soak may be necessary.
- Remove the tool and scrub with a wire brush or coarse steel wool. The rust should come away much more easily after soaking.
- Rinse thoroughly with water and dry immediately and completely to prevent new rust from forming.
Important: Don't soak handles along with metal parts. Remove handles before soaking, or prop the tool so only the metal head is submerged.
Mechanical Rust Removal
For light surface rust or after a vinegar soak, mechanical removal with sandpaper and wire brushes is highly effective. Work through grits progressively — start with coarse sandpaper (80 grit) to remove bulk rust, then move to 120 grit for smoothing, and finish with 220 grit for a cleaner surface.
A wire wheel attachment on a power drill dramatically speeds up this process and works especially well on heavily pitted surfaces. Always wear eye protection when using rotary wire brushes, as bristles can break off and become projectiles.
Using Rust Converter
For tools with very heavy rust where complete removal isn't practical, rust converter products can chemically transform rust into a more stable compound, providing a surface that can be painted or oiled over. Follow the product instructions carefully, and bear in mind that rust converter is a finishing treatment, not a substitute for removing loose, flaking rust first.
Restoring Wooden Handles
A well-restored wooden handle feels wonderful in the hand and helps prevent blisters, splinters, and fatigue during long gardening sessions.
Sanding and Smoothing
Begin with 80-grit sandpaper to address rough spots, splinters, or old paint. Work with the grain of the wood, not against it. Progress to 120 grit and then 220 grit for a smooth finish. Pay extra attention to any areas around ferrules or where your hand naturally rests.
Conditioning with Oil
Linseed oil is the traditional and most widely recommended choice for conditioning garden tool handles. Boiled linseed oil penetrates wood more quickly than raw linseed oil, making it a popular choice. Tung oil is an excellent alternative that also offers good water resistance.
Apply oil with a clean rag, working it into the grain generously. Allow it to soak in for 15–20 minutes, then wipe away any excess. Repeat this process two or three times over several days, allowing each coat to dry fully between applications. The wood will deepen in color and become noticeably more resilient.
Replacing Handles
If a handle needs replacing, hardwood handles are available at many hardware stores and online suppliers. Ash, hickory, and oak are all traditional choices that provide excellent strength and flexibility. When fitting a new handle, ensure the socket connection is tight — wooden wedges or metal wedges hammered into the top of the handle inside the socket are the traditional method for securing a snug fit.
Sharpening Garden Tool Blades
Many gardeners don't realize how much a sharp tool improves their experience. A sharp spade cuts through soil and roots cleanly; a sharp hoe slices through weeds at the soil surface rather than pushing them aside.
Tools That Benefit from Sharpening
Not every garden tool needs a razor-sharp edge, but these tools benefit significantly from regular sharpening:
- Spades and shovels: A beveled edge on the blade makes digging far more efficient.
- Hoes: A sharp hoe glides through soil and severs weed roots cleanly.
- Pruners and loppers: These benefit from very fine sharpening using a whetstone or diamond file.
- Garden forks: The tines don't need a true edge, but burrs and rough spots can be smoothed.
- Trowels: A sharpened trowel blade makes planting much easier, especially in compacted soil.
Using a Mill File
A flat mill file (also called a bastard file) is the workhorse tool for sharpening spades, hoes, and similar tools. Here's the process:
- Secure the tool in a vice or brace it against a stable surface.
- Identify the original bevel — most tools have a single-sided bevel of around 45 degrees.
- Hold the file at the same angle as the bevel and push it across the edge in smooth, even strokes.
- Work from one end of the blade to the other, maintaining consistent angle and pressure.
- After several passes, feel the back (flat) side of the blade for a slight burr or wire edge — this tells you you're removing material effectively.
- Flip the tool and make one or two light strokes on the flat side to remove the burr.
Refining with a Whetstone
For a finer edge on trowels, hoes, or any tool where a cleaner cut is desired, follow up with a medium or fine whetstone. Wet the stone with water or honing oil, and use the same consistent angle as the original bevel. Circular or figure-eight strokes work well for smaller blades.
Finishing and Protecting Your Tools
Once your tools are clean, smooth, and sharp, protect them so they stay that way.
Protecting Metal Surfaces
A light coat of linseed oil on metal surfaces provides excellent rust protection. Apply with a clean rag after sharpening, let it sit for a few minutes, and wipe away any excess. Some gardeners prefer a light coat of WD-40 or paste wax for storage protection, especially in humid climates.
Proper Storage
Store tools hanging on wall hooks or in a rack where metal parts don't contact the floor. Moisture from concrete or soil contact accelerates rust. If storing for the winter, a light oil coating and a dry environment are your best defenses.
Common Mistakes to Avoid
Even well-intentioned restoration efforts can go wrong. Here are the most common pitfalls to watch for:
- Skipping safety equipment: Rust particles, metal shards, and chemical fumes are genuine hazards. Always wear gloves, eye protection, and a mask.
- Over-soaking in vinegar: Leaving tools in vinegar for too long (more than 24–36 hours) can begin to etch and pit good metal. Check regularly and remove as soon as rust softens.
- Sanding against the wood grain: This leaves visible scratches and weakens the wood fibers. Always sand with the grain.
- Using the wrong sharpening angle: Trying to create a steeper or shallower bevel than the original can weaken the edge. Follow the existing bevel.
- Oiling before fully drying: Applying linseed oil to damp wood or metal traps moisture, leading to rot or rust beneath the surface. Ensure everything is completely dry first.
- Ignoring structural damage: A cracked handle or badly damaged blade is a safety risk. Don't try to restore tools that are genuinely beyond repair — they can fail under load and cause injury.
- Rushing the process: Restoration done in haste — skipping sanding grits, applying single heavy oil coats instead of thin repeated coats — produces inferior results. Take your time.
Tips for Success
- Start with one or two tools: If you're new to restoration, practice on a simple trowel or hoe before tackling something more complex like a cultivator or pruning saw.
- Label your filing angle: A small piece of tape marking the angle on your file setup can help you maintain consistency across a long sharpening session.
- Keep a restoration log: Especially in community gardens, note what was done to each tool and when. This helps with maintenance scheduling and keeps shared equipment in good shape.
- Use quality oil: Food-grade linseed oil or traditional boiled linseed oil is preferable to cheap substitutes. Quality oil penetrates better and provides longer protection.
- Do regular maintenance: A quick wipe-down with an oily rag at the end of each gardening season is far easier than a full restoration project every few years.
- Involve the community: Tool restoration sessions are social, skill-sharing events. Consider hosting regular "sharpen and restore" afternoons at your community garden plot.
Conclusion
Restoring antique garden tools is one of the most rewarding projects a gardener can undertake. Beyond the practical benefits of having reliable, well-balanced tools at hand, there's something meaningful about extending the working life of objects that were made with care and used with purpose. Each restored spade or sharpened hoe is a small act of resistance against the throwaway culture that surrounds us.
For community gardens especially, well-maintained tools create a foundation of shared pride and practical capability. When members know how to assess, restore, and sharpen the equipment they use together, that knowledge strengthens the whole community.
Take your time, respect the process, and don't be discouraged by a little rust. Beneath that weathered surface, there's almost certainly a tool worth keeping.