Getting Started
Before you buy a single bolt or sketch a single layout, take time to define your goals. Ask yourself and your team these foundational questions:
- Who is your primary audience? Children, seniors, immigrant communities, low-income families, or a mix of all of the above?
- What will you teach? Seed starting, composting, container gardening, food preservation, pest identification?
- How often will you travel? Weekly, monthly, or for special events only?
- What is your budget? This will shape every decision that follows.
A clearly defined purpose will prevent scope creep and help you make smarter decisions throughout the build process. A trailer designed to teach elementary school kids about seed germination looks very different from one designed to demonstrate drip irrigation systems to adult urban farmers.
Once your goals are clear, form a small planning committee of two to five people with complementary skills — ideally including someone with basic carpentry knowledge, someone with educational program experience, and someone who knows how to tow and maintain a trailer safely.
Why a Mobile Education Trailer Matters
Community gardens change lives, but they can only do that if people know about them and feel equipped to participate. A mobile education trailer solves several challenges at once:
Accessibility: Not everyone can travel to a garden site, especially elderly residents, parents with young children, or people working multiple jobs. Bringing education to familiar neighborhood spaces lowers the barrier to entry dramatically.
Visibility: A bright, well-branded trailer parked at a community event generates curiosity and conversation. It becomes a talking point and a symbol of your program's presence.
Hands-on Learning: Unlike a flyer or social media post, a physical trailer allows visitors to touch soil, smell herbs, handle tools, and ask real questions in real time. This kind of experiential learning sticks.
Resource Distribution: Your trailer can serve as a mobile distribution point for seeds, seedlings, soil amendments, and printed guides — all while your team provides personalized instruction.
Planning and Design Essentials
Good design starts on paper. Before any construction begins, create a detailed floor plan of your trailer layout. Think about flow — how will visitors enter, move through, and exit the space? Even on a small trailer, logical traffic patterns make the experience feel welcoming rather than cramped.
Key Zones to Consider
Display and Demonstration Zone: This is where you show off live plants, growing systems, or demonstration beds. A built-in raised planter box along one wall or mounted vertically can make a huge visual impact. Use weather-resistant materials like cedar or composite lumber.
Interactive Hands-On Zone: Provide a low table or counter where visitors can touch soil, pot up a seedling, or examine compost. Make this zone accessible for children and wheelchair users.
Resource and Literature Zone: Shelves or wall-mounted pockets for seed packets, printed guides, and take-home materials. Keep this area tidy and easy to browse quickly.
Storage Zone: Under-counter or rear storage for supplies, tools, extra inventory, and equipment you don't need on display. Good hidden storage keeps the public-facing areas clean and professional.
Electrical and Water Considerations
If your outreach events last several hours, you'll want to think about power and water access. A small solar panel system can run LED lighting, a fan, and a tablet for digital presentations. A simple freshwater tank with a hand pump allows visitors to water plants or wash their hands — a small touch that goes a long way at events with children.
Choosing the Right Trailer Base
Your trailer base is the foundation of everything, so choose carefully.
Enclosed Cargo Trailers: These are the most popular choice for education trailers. Sizes ranging from ten to sixteen feet offer excellent weather protection and security when locked. They're widely available new or used, and their flat interior walls make customization straightforward.
Open Utility Trailers with Canopy: A lower cost option that works well in fair weather climates. Add a shade canopy and removable side panels to create a semi-enclosed feel. Less secure but more open and inviting for quick public interactions.
Converted Food Trailers or Concession Trailers: If your budget allows, a used food-service trailer often comes pre-wired and pre-plumbed, saving significant build time. The service window design is perfect for distributing materials or demonstrating techniques to a crowd standing outside.
When evaluating used trailers, inspect the floor carefully for soft spots or water damage, check that all lights and brakes function properly, and verify that the tongue weight and GVWR (gross vehicle weight rating) are appropriate for your towing vehicle.
Building Out Your Educational Space
Once you have your trailer, the real creativity begins.
Walls and Ceiling
Paint interior walls with a light, bright color to make the space feel open and welcoming. Chalkboard paint on one wall gives you a reusable teaching surface that kids absolutely love. You can write the day's lesson topic, draw a plant diagram, or let children doodle while parents browse resources.
Use pegboard panels to create a flexible, customizable wall for hanging tools, seed packets in labeled bins, and small potted herbs. Pegboard is inexpensive, easy to install, and endlessly adaptable as your program evolves.
Flooring
Choose a flooring material that handles dirt, water, and heavy foot traffic without complaint. Rubber mat flooring used in gym or commercial settings is ideal — it's non-slip, easy to clean, comfortable to stand on, and durable enough to withstand years of use.
Shelving and Counters
Build counters at two heights: standard adult counter height (around 36 inches) and a lower child-friendly surface (around 24 inches). This simple accommodation makes your trailer genuinely inclusive and signals to families that children are welcome and considered.
Use solid wood or moisture-resistant MDF for shelving, sealed with an exterior-grade finish to handle the inevitable humidity from live plants and wet soil.
Signage and Branding
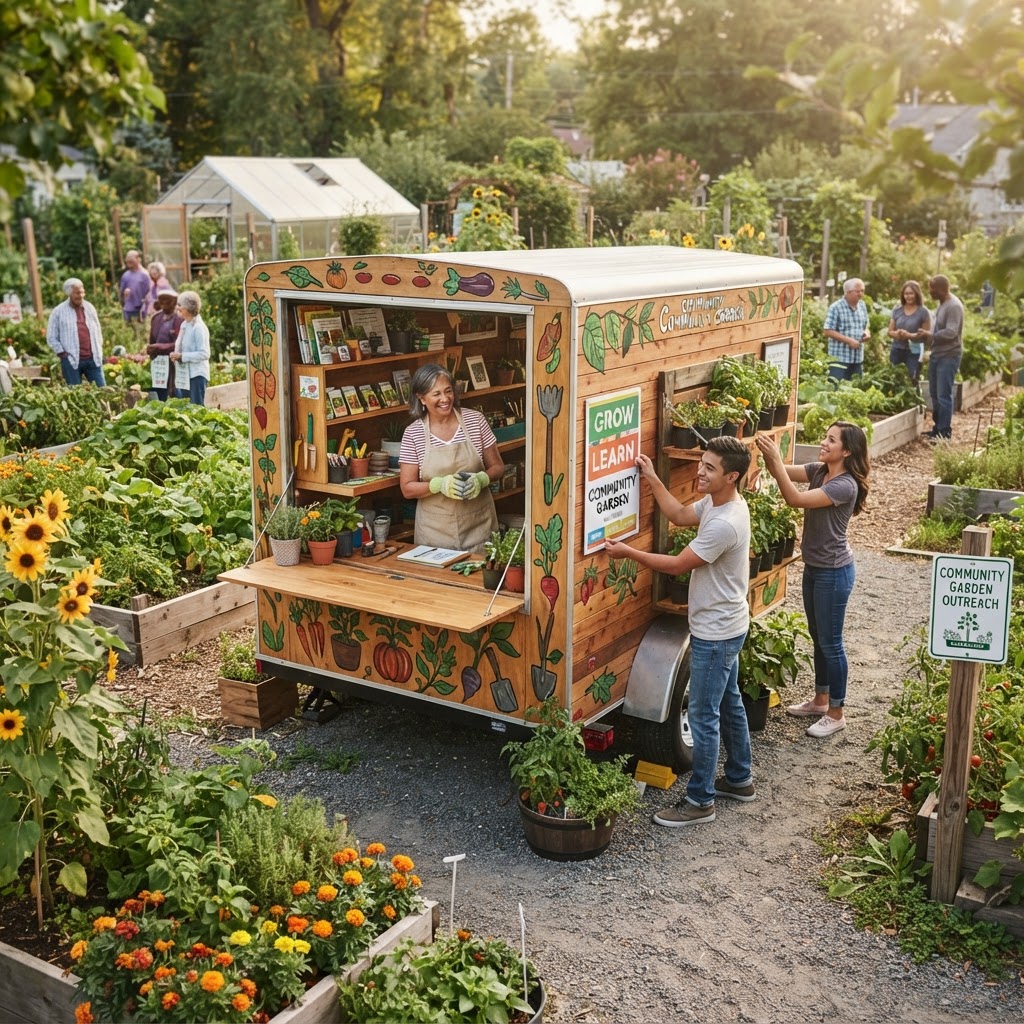
Exterior vinyl wraps or painted signage transform a plain cargo trailer into a rolling ambassador for your program. Work with a local print shop to design graphics that reflect your community garden's identity. Include your organization's name, a simple tagline, and contact information. Bright colors and botanical imagery attract attention from a distance.
Stocking Your Trailer with the Right Tools and Materials
A beautiful trailer with nothing useful inside defeats the purpose. Stock thoughtfully based on your defined educational goals.
Essential Teaching Supplies:
- Seed starter trays and small pots for hands-on potting demonstrations
- Bags of seed-starting mix, potting soil, and compost samples
- A variety of easy-to-grow seed packets for giveaway
- Plant identification cards or laminated guides for common vegetables and herbs
- Magnifying glasses and soil test kits for kids and curious adults
Tools for Demonstration:
- A set of basic hand tools (trowels, pruners, transplanting forks) for show and demonstration
- Small watering cans
- Examples of beneficial insects in display cases or laminated photos
- A vermicomposting bin with live worms — always a crowd-stopper
Printed and Visual Resources:
- Seasonal planting calendars specific to your region
- Beginner's guides to composting, water conservation, and pest management
- Information about your community garden including how to get a plot or volunteer
- Multilingual materials if your community includes non-English speakers
Common Mistakes to Avoid
Building and operating a mobile education trailer involves learning curves. Here are the pitfalls most first-time builders encounter:
Overloading the Trailer: It's tempting to pack in everything imaginable, but an overloaded trailer is unsafe to tow and overwhelming for visitors. Start with a curated selection of materials and add over time.
Ignoring Ventilation: Live plants, soil, and crowds of people in an enclosed metal trailer create heat and humidity quickly. Install roof vents and a small fan from the beginning, not as an afterthought.
Skipping the Permit Research: Depending on your municipality, setting up an education trailer at public events may require permits, insurance certificates, or coordination with parks departments. Research local requirements early to avoid being turned away from events.
Underestimating Maintenance: Trailers require regular maintenance — tire pressure, brake checks, rust prevention, interior cleaning after events. Build a simple maintenance checklist and assign responsibility clearly.
Neglecting Accessibility: If your trailer is only accessible by a steep ramp or requires climbing steps, you've excluded a significant portion of your potential audience. Design for accessibility from the beginning.
Poor Tow Vehicle Planning: Make sure whoever drives and tows the trailer is properly licensed and comfortable with the vehicle combination. Practice backing and parking in an empty lot before your first real event.
Tips for Success
Partner Early and Often: Connect with schools, libraries, faith communities, and local nonprofits before you launch. Having confirmed event placements before your trailer is finished will motivate your team and ensure the project reaches completion.
Train Multiple Volunteers: Your trailer should never depend on one or two people to operate. Develop a simple training guide so that any engaged volunteer can staff an event confidently.
Create an Event Feedback System: Use a simple sign-in sheet or feedback card at every event. Knowing how many people you reached, where they heard about you, and what they want to learn next will help you improve every single outing.
Rotate Displays Seasonally: Keep your trailer fresh by changing plant displays, seed offerings, and printed materials with the seasons. A spring trailer focused on seed starting should look and feel different from a fall trailer centered on cover crops and garden cleanup.
Document Everything: Photos and videos of your trailer in action are invaluable for grant applications, social media, and community presentations. Designate someone at each event to capture moments — especially children engaging with plants for the first time.
Set Realistic Goals: You won't transform your entire neighborhood in one season. Focus on building genuine relationships at each event rather than maximizing headcount. Quality engagement over quantity will build a more committed long-term community.
Conclusion
Building a mobile community garden education trailer is an investment of time, money, and creative energy — but the returns are extraordinary. When your trailer rolls into a neighborhood and a child plants their first seed, or a senior rediscovers the joy of growing food, or a new immigrant family finds connection through shared knowledge of gardening traditions, you'll know it was worth every hour of planning and every nail driven.
Start with clarity of purpose, build with practicality and inclusivity in mind, and staff your trailer with enthusiastic, knowledgeable volunteers who genuinely love sharing what they know. The mobile education trailer isn't just a vehicle — it's a rolling invitation for your whole community to participate in the life-giving work of growing food together.