Getting Started
Before you pick up a screwdriver or order a single solar panel, it helps to understand what you're actually building and whether it's the right project for your space.
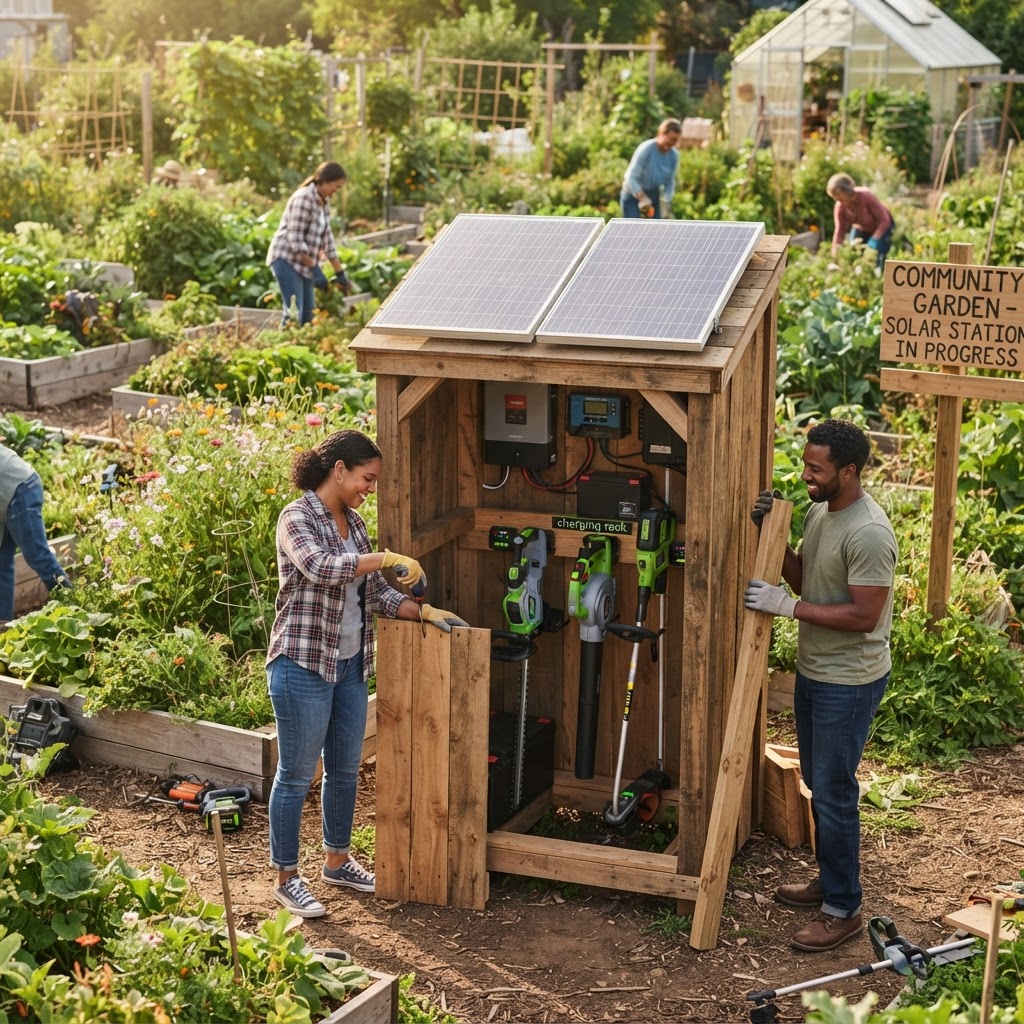
A solar charging station is essentially a small solar power system with three core jobs: capturing sunlight, storing that energy in a battery, and delivering it to your tools as reliable, usable power. You don't need an engineering degree to pull this off, but you do need a clear picture of your garden's energy needs and physical layout.
Ask yourself these questions before you begin:
- How many tools need charging, and how often are they used?
- Does your garden receive consistent direct sunlight, or is it shaded by trees and buildings?
- Do you need power available at night or on cloudy days, or is daytime charging sufficient?
- What is your budget, and are there any grant programs or community funds you can tap into?
- Do local regulations require permits for solar installations, even small ones?
Answering these questions honestly will shape every decision that follows. A small community plot with two or three cordless tools has very different needs than a large operation with a full fleet of battery-powered equipment.
Why Solar Charging Makes Sense for Community Gardens
Electric tools charged by solar energy represent a natural partnership. Gardens already depend on the sun to grow food — why not use that same resource to power the tools that tend it?
Beyond the obvious environmental appeal, there are practical advantages that matter especially in a shared community setting:
Energy independence: A solar-powered station doesn't rely on a connection to the grid, which makes it ideal for gardens in parks, vacant lots, or rural areas where running an electrical line would be expensive or impractical.
Lower running costs: Once installed, the sun provides fuel for free. This reduces the ongoing operational expenses that often stress volunteer-run community gardens.
Encouraging responsible tool use: When members can see the energy they're consuming displayed on a simple monitor, it naturally promotes more mindful usage.
Educational value: A visible solar installation becomes a teaching tool in its own right. Schools, youth programs, and new gardeners can learn about renewable energy in a hands-on context.
Reduced noise and emissions: This one is simple — electric tools charged by clean solar energy produce no exhaust and minimal noise, making the garden a more pleasant place to spend time.
Planning Your Solar Charging Station
Good planning prevents expensive mistakes. Spend as much time in the planning phase as you need — it pays off enormously during the build.
Assessing Your Energy Needs
Start by listing every electric tool your community garden currently owns or plans to acquire. For each tool, note the battery voltage (typically 18V, 20V, 40V, or 80V) and the battery capacity in watt-hours (Wh). This information is usually printed on the battery itself or available in the tool's manual.
Add up the total watt-hours you'd need to fully charge all batteries in a single day. This gives you your daily energy demand. A realistic charging station for a small to mid-sized garden typically falls somewhere between 200 and 800 watt-hours per day, though your actual numbers may vary.
Choosing the Right Location
Your solar panels need unobstructed access to sunlight for as many hours as possible. In the northern hemisphere, south-facing panels at an angle roughly equal to your latitude will perform best. Avoid locations where buildings, fences, or mature trees cast shadows during peak sun hours (roughly 10 a.m. to 3 p.m.).
Equally important is proximity to where tools are stored and used. The shorter the cable runs between your charging station and your tool storage area, the less energy you lose to resistance and the more convenient the system becomes for everyday members.
Sizing Your System
A properly sized system balances three elements:
- Solar panels — enough to capture your daily energy demand and recharge the battery bank
- Battery storage — enough capacity to cover cloudy days or high-demand periods
- Charge controller and inverter — sized to handle the combined load without overheating or underperforming
For most community gardens, a system in the range of 200–600 watts of solar panel capacity, paired with 400–1,000 Wh of battery storage, is a practical and affordable starting point. It's always better to build slightly larger than you think you need, because tools get added over time.
Components You'll Need
Here is a breakdown of the key components and what to look for in each:
Solar Panels Monocrystalline panels are the most efficient and perform better in partial shade than polycrystalline options. For a portable or semi-permanent installation, rigid panels mounted on a simple frame work well. Flexible panels are an option for curved surfaces but are generally less durable over the long term.
Charge Controller An MPPT (Maximum Power Point Tracking) charge controller extracts more energy from your panels than older PWM models, especially during partially cloudy conditions. This makes it worth the slightly higher cost. Match the controller's amperage rating to your panel array.
Battery Bank Lithium iron phosphate (LiFePO4) batteries have become the preferred choice for small solar systems. They are safer than other lithium chemistries, charge faster, tolerate more charge cycles, and perform better in a wider range of temperatures. Sealed lead-acid batteries are a cheaper entry point but are heavier, less efficient, and have a shorter lifespan.
Inverter If any of your chargers require standard AC power (like a wall outlet), you'll need a pure sine wave inverter to convert the DC power from your battery. Pure sine wave models are more reliable for sensitive electronics than modified sine wave inverters. For systems using only DC-compatible chargers, you may be able to skip this component.
Charging Ports and Outlets USB-A and USB-C ports cover small devices. For larger tool chargers, weatherproof AC outlets or DC power distribution panels give members easy access. Label each port or outlet clearly so members know what goes where.
Enclosure and Mounting Hardware A weatherproof metal or heavy-duty plastic enclosure protects your charge controller, battery, and inverter from rain, humidity, and pests. Panel mounting frames can be purchased as kits or fabricated from aluminum angle stock for a budget-friendly custom solution.
Monitoring Display (Optional but Recommended) A basic battery monitor or smart display lets members see current battery state, solar input, and power consumption. This transparency encourages responsible use and helps you spot problems early.
Step-by-Step Build Process
Step 1: Mount the Solar Panels
Install your panels on the mounting frame at the optimal angle and orientation determined during planning. Secure all connections firmly and run the cable from the panels to the enclosure, protecting it with conduit wherever it might be exposed to foot traffic, tools, or garden equipment.
Step 2: Install the Charge Controller
Inside the enclosure, mount the charge controller on a flat surface with room for ventilation. Connect the solar panel cable to the designated input terminals, following the positive and negative polarity marked on the controller. Do not connect the battery yet.
Step 3: Connect the Battery Bank
Connect the battery to the charge controller's battery terminals, again observing correct polarity. Most charge controllers will automatically detect the battery voltage and configure themselves accordingly. Consult your controller's manual if setup prompts are required.
Step 4: Connect the Inverter and Outlets
If using an inverter, connect it to the battery bank using appropriately sized cables with in-line fuses for protection. Mount your AC outlets and USB charging ports, wiring them through the inverter output. All wiring inside the enclosure should be neat, labeled, and secured against vibration.
Step 5: Test the System
Before closing everything up, verify that the charge controller shows solar input during daylight, that the battery reads its correct charge level, and that outlets and charging ports deliver power correctly. Plug in a single charger and let it run a full charge cycle to confirm everything works as expected.
Step 6: Label and Document
Create simple, clear labels for every port, outlet, and switch. Write up a one-page user guide for garden members explaining how to use the station safely. Store a copy inside the enclosure and post another near the tool shed.
Weatherproofing and Safety
Outdoor electrical systems face constant exposure to moisture, temperature swings, UV radiation, and physical impacts. Taking weatherproofing seriously from the start prevents failures that are both costly and potentially dangerous.
- Use IP65-rated or higher enclosures for any components exposed to the elements
- Seal cable entry points with weatherproof grommets and silicone sealant
- Elevate the enclosure off the ground to prevent water intrusion from flooding or heavy rain
- Apply UV-resistant coating or use UV-rated cables on any wiring exposed to direct sunlight
- Install a disconnect switch that allows the entire system to be safely shut down for maintenance
- Check all connections at the start of each growing season for corrosion or looseness
If you're uncertain about any aspect of the electrical work, consult a licensed electrician. Even low-voltage DC systems can deliver harmful currents under fault conditions.
Common Mistakes to Avoid
Underestimating energy needs. Many first-time builders calculate the bare minimum and then wonder why the battery runs out by midweek. Always add a buffer of at least 25–30% above your estimated daily demand.
Skipping the charge controller. Connecting solar panels directly to a battery without a charge controller will overcharge and destroy the battery. This is not optional hardware.
Using undersized wiring. Thin wire creates resistance, generates heat, and reduces efficiency. Use cable gauges rated for the current your system will carry, with a comfortable margin for safety.
Neglecting shading. Even a small shadow on part of a panel can significantly reduce output from the entire array. Test your chosen location at different times of day and at different seasons before committing.
Mixing incompatible battery chemistries. If you expand your battery bank, make sure all batteries are the same chemistry, voltage, and ideally the same brand and model. Mixing types can lead to uneven charging and premature failure.
Ignoring user education. A beautifully built system will fail in practice if garden members don't know how to use it correctly. Invest time in training and signage.
Forgetting about seasonal sun angles. The sun sits much lower in the sky in winter than in summer. If your garden operates year-round, design your panel angle to capture adequate light through the lower-sun months as well.
Tips for Success
- Start small and scale up. A modest 200W system that works reliably builds community confidence. You can always add panels and battery capacity as demand grows.
- Prioritize high-use tools. Identify the two or three tools that get used most often and design the station to handle them reliably before worrying about edge cases.
- Create a charging schedule. For busy gardens, a simple sign-up sheet or charging schedule prevents one member from monopolizing the station while others wait.
- Keep a maintenance log. Record connection checks, cleaning dates, and any issues you notice. Patterns in the log can catch small problems before they become big ones.
- Clean your panels regularly. Dust, bird droppings, and pollen reduce panel output noticeably over time. A gentle wipe with a damp cloth every few weeks maintains peak performance.
- Partner with local schools or makerspaces. These groups often have technical expertise and may jump at the chance to collaborate on a community project with visible educational value.
- Apply for grants. Many regional environmental organizations, utility companies, and community development funds offer grants for exactly this kind of sustainable infrastructure project.
Conclusion
Building a solar charging station for your community garden is one of the most practical and rewarding infrastructure projects you can undertake. It reduces your dependence on grid electricity, keeps shared tools reliably charged, and demonstrates a visible commitment to sustainability that can inspire everyone who visits the garden.
The project is genuinely achievable for gardeners with modest technical experience, provided you take the time to plan carefully, choose quality components, and follow safe installation practices. Start with a system sized for your current needs, document everything clearly for your community members, and build in room to grow as your garden expands.
Every time a volunteer picks up a fully charged electric pruner or cultivator, they benefit from the effort you put into this station. That quiet, reliable service is exactly what community infrastructure is supposed to provide.